Inflatables for Projection Mapping
- Creative Inflatables
- Apr 13
- 7 min read
Projection mapping inflatables are large format, temporary structures designed to act as a physical canvas for immersive visuals at events. When a production needs a clean silhouette, controlled footprint, and a surface that reads clearly from a distance, an inflatable can create that environment quickly without building a permanent set piece. This approach works well for stages, festival grounds, brand activations, museums, and venue programming where load in time is limited but the visual moment still needs to feel intentional and high impact.

Instead of relying on flat backdrops alone, mapping onto a three dimensional inflatable can help transform a space and guide attention toward a specific zone. Domes, spheres, tunnel style entries, and custom scenic forms can be engineered to support projection goals, including smoother surface areas, consistent geometry, and practical access points for setup. The result is a projection ready structure that can function as an entrance landmark, a focal point near a stage, or a stand alone centerpiece that supports show timing and guest flow.
We focus on manufacturing the inflatable itself, built to fit the footprint, shape, and deployment requirements of the event. Projection equipment and mapping operation are typically handled by the client’s production team or AV partner, and we coordinate around those inputs so the inflatable is designed to match the projection plan. If you share your timeline, venue type, approximate dimensions, and the basic projection approach, we can recommend the right inflatable format and outline the fastest path to a build that is practical onsite and aligned with the visual experience you are aiming to create.

What Projection Mapping Inflatables Solve At Events
Projection mapping works best when the surface is predictable, clean, and easy for a production team to aim and focus. That’s where projection mapping inflatables come in. They create a large, controlled canvas that can be placed where the crowd already is, including near entrances, stage zones, sponsor footprints, or central plazas. Instead of relying on a venue wall or a temporary build that may not map cleanly, an inflatable projection surface gives you a repeatable shape that reads from a distance and supports the show direction.
These builds also solve practical event constraints. They load in faster than scenic construction, they can be scaled to fit different footprints, and they can be repositioned if the layout changes. When the goal is a high-impact visual moment but timing, budget, or venue rules limit what can be built, a projection-ready inflatable becomes a clean way to deliver polished visuals while keeping the setup manageable for the crew on site.
Projection mapping inflatables help create big visual impact without building permanent scenery, turning open spaces into immersive mapped environments fast while also serving as clear, high visibility landmarks for guest flow, repeatable set pieces for touring activations, and dynamic moments for reveals, countdowns, sponsor stories, or themed scenes.
Choosing The Right Shape For Projection Mapping
Inflatable Domes
Domes are the best fit when you want an immersive interior where visuals can wrap the space and stay consistent for the audience. They work well for timed shows, brand storytelling, and experiences where you want more control over sightlines.
Inflatable Spheres And Rounded Forms
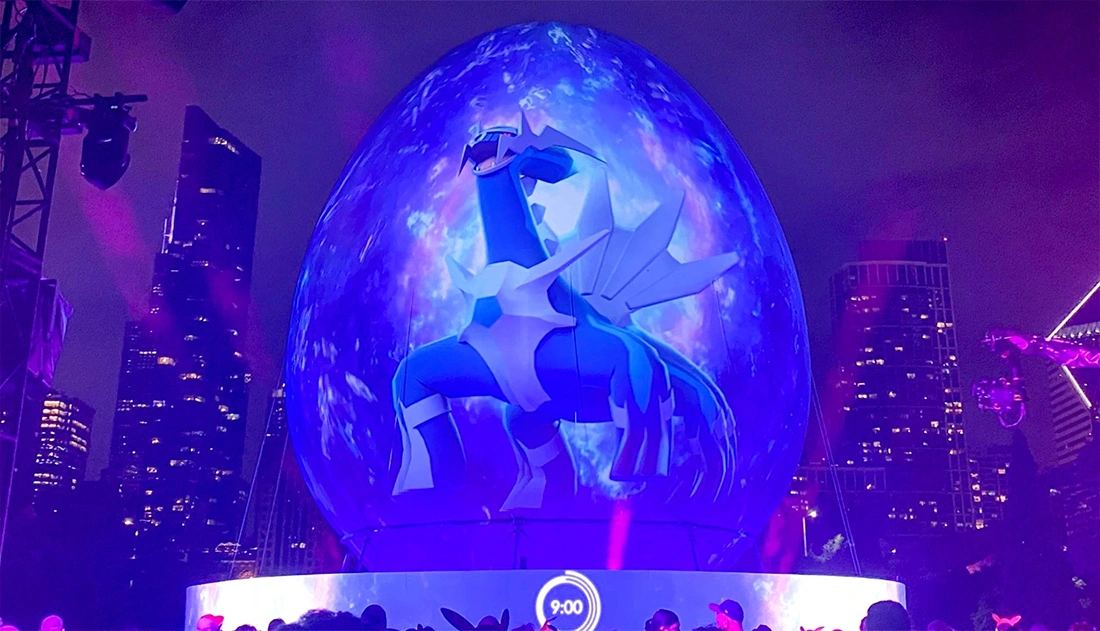
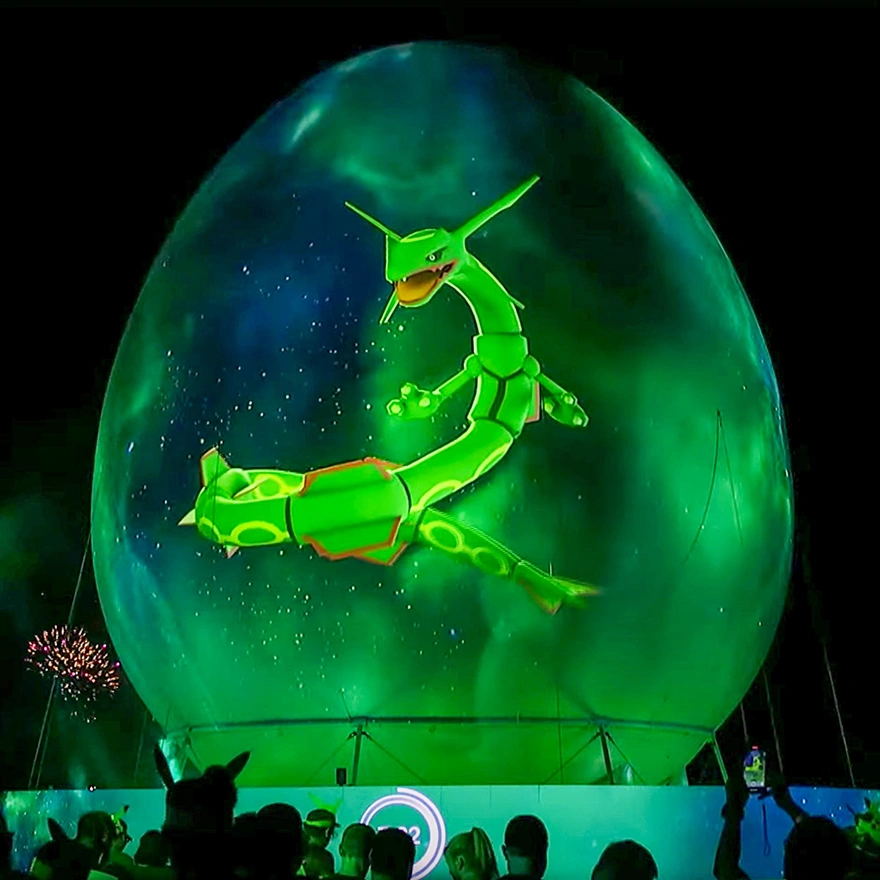
Spheres and rounded builds are ideal for projection mapping that needs a strong silhouette from far away and visual continuity from multiple angles. These shapes support 360-style object mapping, hero-photo moments, and outdoor landmarks where the form does most of the work.

Inflatable Tunnels And Archways
Tunnels and arches are built for entrances and transitions, giving guests a clear “start here” moment and a natural walkthrough path. They are commonly used for arrival sequences, sponsor reveals, and themed gateways that set the tone before people reach the main footprint.
Custom Scenic Forms
Custom shapes are the right move when the inflatable needs to look like a branded object or a specific set piece, such as a mascot, logo, product replica, or sculptural form. This is where projection mapping becomes part of the design plan from the beginning so the surface and silhouette support the visuals instead of fighting them.
What Makes An Inflatable “Projection Ready”
A projection mapping inflatable performs best when the shape is built with consistency in mind. Smooth, readable geometry gives content a predictable surface to land on, which helps mapped visuals look intentional instead of distorted. When a form has clean curves and stable planes, it also becomes easier to plan projector placement and keep the image readable from typical viewing angles in real event footprints.
Seam placement matters just as much as the overall silhouette. Panel planning is where the build is engineered so seams and attachment points are kept out of the primary viewing areas whenever possible, especially on the front facing surfaces where the main visuals will live. Color and finish also affect projection clarity. Neutral tones tend to preserve brightness and color accuracy better than saturated fabrics, and a more matte looking surface helps reduce glare compared to glossy finishes under strong lighting. Finally, access points, inflation hardware, and anchoring interfaces should be planned so they stay functional without interrupting the projection surface, which keeps the final setup cleaner for both the production team and the audience.
Indoor Vs Outdoor Deployment Considerations
For indoor installs, planning usually starts with clearance and access. Ceiling height, rigging points if the inflatable will be suspended, and the dimensions of load in doors all affect what size and shape can move into position without delays. Power routing matters as well, since blower placement and extension runs should be planned so cords stay out of walk paths, and it helps to leave a clean buffer around the inflatable so the silhouette remains readable and guest flow stays comfortable.
For outdoor installs, the priorities shift to anchoring and surface conditions. The placement surface influences the staging approach, and a tarp base is commonly used to protect the inflatable and keep the footprint consistent. Outdoor setups should be planned with normal weather exposure in mind, including how the inflatable will be secured and how the venue handles wind management for temporary structures. In both environments, staging details make the difference. Identifying where the blowers will sit, how cords and tethers will be routed, and how walkways will remain clear helps the deployment feel professional and keeps the mapping plan easier to execute onsite.

Coordinating With A Projection Team
Projection mapping projects run smoother when the inflatable is designed around the production plan from the start. We manufacture the inflatable structure and the projection surface, while the projection equipment, media servers, and mapping operation are typically handled by your AV partner or internal team. The goal is simple: build a shape that supports the visual concept and installs cleanly within the real constraints of the venue.

To engineer the right format, it helps to share a few details early, even if they are preliminary. The most useful inputs are where projectors are expected to be positioned, the general throw distance range available, and what the content is intended to do, such as wrapping a surface, focusing on a single hero side, or delivering a timed reveal. Early coordination also helps avoid last minute compromises around seams, access points, and staging space, so the final build aligns with the mapping plan and the onsite setup stays predictable for the crew.
Planning Details For A Fast Quote
The quickest way to price and plan projection mapping inflatables is to start with timing and the basic deployment context. Let us know when you need the inflatable in hand, the venue type, and whether the setup will be indoors or outdoors, so we can confirm the right build approach and any lead time considerations. It also helps to share your target footprint and height range, along with the shape you are considering, such as a dome, sphere, tunnel, or a custom scenic form.

If a projection plan already exists, a general idea of where projectors will be placed and the approximate throw distance range is enough to guide surface planning and orientation. If branding is part of the build, include any logo files, preferred messaging, and the current status of artwork so we can align print coverage and approvals with the timeline. With those details, we can recommend the best format for your event and outline the most practical path to a projection ready inflatable that fits the space and supports the visual plan.
Common Mistakes To Avoid
Projection mapping inflatables work best when the build is planned around the projection plan, not the other way around. A common issue is choosing a shape that limits projector placement or forces steep angles that make content harder to read. It also helps to consider seam placement early so key visuals are not landing across panel breaks, and to leave enough footprint and buffer space so the silhouette stays visible and the crew can stage equipment cleanly. Finally, locking artwork and basic dimensions early prevents last minute compromises that can affect print coverage, orientation, and overall timing.
Projection Mapping FAQs
Do you provide the projectors or mapping system?
We manufacture the inflatable projection surface and structure. Projection equipment and mapping operation are typically supplied by your AV partner or internal production team.
What inflatable shapes work best for projection mapping?
Domes, spheres, tunnels, and custom scenic forms can all work well. The best choice depends on whether you need an immersive interior, a 360 style object, an entrance walkthrough, or a branded set piece.
Can projection mapping inflatables be used outdoors?
Yes, as long as the deployment is planned for anchoring, surface conditions, and typical weather exposure. Outdoor use also benefits from early coordination on projector placement and ambient light.
What information do you need to quote a projection mapping inflatable?
Start with when you need it in hand, venue type and indoor or outdoor use, target footprint and height, preferred shape, general projector placement or throw distance range, and any branding files or artwork status.
If you are ready to move forward, share your timeline, venue constraints, and projection approach and we will recommend the best format and provide pricing and availability based on the configuration.